Written in partnership with ICP
One of the most troublesome insulation and air sealing tools is the Foam Gun, but they don’t have to be. Here are some tips to get the most for your investment.
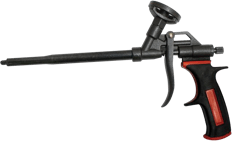 Possibly the biggest mistake everyone makes, is running cleaner through the gun. As counter intuitive as that sounds, it ruins them. Yes, cans of cleaner have a collar on them, leading you to believe it is the right thing to do. However, gun foam uses moisture from the air to initiate the curing process. Consequently, gun cleaner is typically acetone based with a percentage of water/moisture, so running cleaner through it, often ends up destroying your tool.
Can these tools last a long time? Absolutely! I still have one that works after about 22 years. Here’s how:
- First, I never put cleaner through the tool, that way I don’t leave residue causing foam to harden inside the gun.
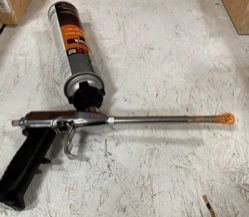 Always keep a can of foam on the gun, even if it’s empty, it contains a dry gas that helps prevent moisture intrusion. That said, be sure to replace the old can with a fresh can as soon as possible.
- Before replacing a can or doing any work on the gun, make sure the metering /safety valve at the back of the gun is completely closed.
- When you switch between cans there’s typically a bit of foam that is left. This is when I use the gun cleaner to flush away the residual foam before putting a new can on the gun. Also, at this point I like to add a little grease to the threads and basket area of the gun to help the can go on and come off easier. Any petroleum-based grease or spray from release works fine. And… make sure you purge the gun after installing the new can, this gets any air pocket inside the tool purged out. Remember, any moisture inside the tool is bad.

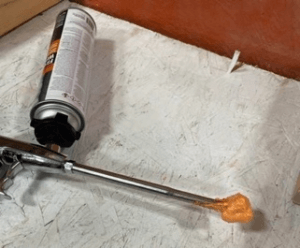
- After every use, make sure the safety/metering valve is fully closed,(Turned completely clockwise) ensuring there can’t be an accidental release of chemical. Then, leave the tip of the gun as covered with as much foam as possible. This creates a protective layer around the tip, to help keep moisture out of the tool. If you really like clean tools, this can be hard to do, but it’s what’s best for the longevity of the tool.
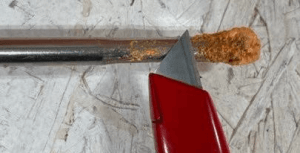
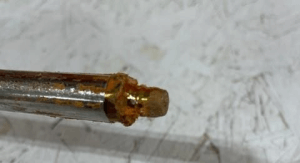
- When you go to use the tool again, simply take a razor knife to the cured foam and it will shave off easy. If a long time has passed, and the gun seems clogged, glue may have sealed the ball at the tip of the gun. You may need to tap on the ball at the tip of the gun, with a rubber mallet, to break the seal.
So, there you have it, how to keep one of the most troublesome tools in an insulator’s arsenal operating at peak performance for the long haul.
A big thanks to Derek Hyde and ICP for sharing their tips to keep your air sealing tool lasting a long time. For more tips and information on any of the products IDI carries, reach out to your local branch or contact anyone at IDI, where we look forward to earning your business every day.